Open post

ARC Raiders Water Pump Walkthrough – Quick Location & Survival Tips

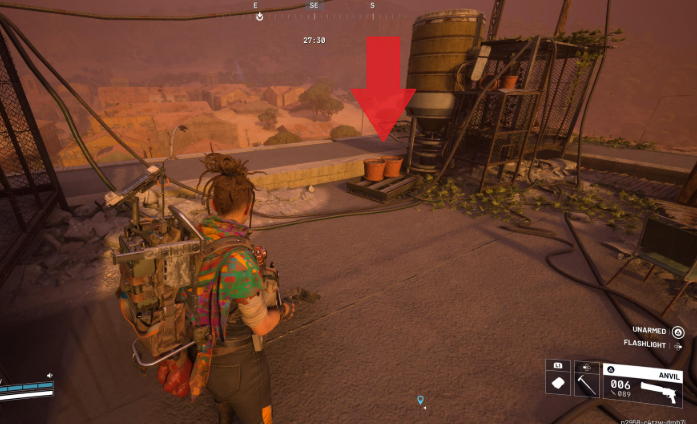
In a game driven by scarcity, shifting objectives, and layered progression systems, even the most overlooked loot can suddenly become essential. That’s exactly what has happened with the Water Pump in ARC Raiders.

Once considered filler loot – something you grabbed only if you had extra backpack space – the Water Pump now plays a critical role in progression. With the Weather Monitor project’s fourth stage requiring one, players across the surface have found themselves scrambling to secure this deceptively rare mechanical component.

Why Water Pumps Matter Now

The Weather Monitor project has transformed the Water Pump from junk-tier clutter into a gated progression item. To complete Stage Four, you need:

·1x Water Pump

·Duct Tape

·Rusted Bolts

·Wasp Drivers

Of these materials, the Water Pump is consistently the hardest to locate.

Duct Tape and rusted bolts commonly spawn in industrial and utility areas. Wasp Drivers drop reliably from ARC enemies. But Water Pumps spawn less predictably, often hidden in mechanical environments with inconsistent placement.

If you want to complete Weather Monitor efficiently, targeted farming is no longer optional – it’s necessary.

Best Maps to Farm Water Pumps

Water Pumps most frequently spawn in mechanical and industrial zones. That makes two maps your best bet:

·Dam Battlegrounds

·Spaceport

Both maps offer dense industrial infrastructure and high container counts, which significantly increase your odds.

Let’s break down the most reliable farming areas.

Dam Battlegrounds – Prime Mechanical Territory

Dam Battlegrounds is packed with industrial interiors, making it one of the most consistent farming maps for Water Pumps.

1. Power Generation Complex

This is one of the strongest Water Pump farming locations on the map.

Search thoroughly:

·Metal crates

·Tool cabinets

·Industrial shelving

·Locker rooms

Because this area also attracts players hunting high-value ARC Raiders Items, expect PvPvE pressure. Clear enemies before looting carefully, and don’t rush your scans – Water Pumps are easy to miss.

2. Controlled Access Zone

Even if you’re not attempting the puzzle inside, the Controlled Access Zone is worth checking.

Water Pumps have been found:

·Inside red lockers

·On maintenance tables

·Inside metal storage crates

· Alongside corridors

The zone’s vertical layout means you should check the upper walkways and the flooded lower levels. Many players sweep quickly and miss small mechanical spawns.

3. Primary Facility

This industrial complex frequently contains:

·Utility closets

·Maintenance rooms

·Mechanical containers

Water Pumps blend into the environment, so slow down and visually sweep surfaces.

4. Water Treatment Control

Thematically appropriate – and yes, Water Pumps do spawn here.

Check:

·Tables

·Boxes

·Metal bins

·Shelving units

It’s one of the more logical spawn points and should be prioritized in farming routes.

Spaceport – High-Yield Industrial Zones

Spaceport is another strong mechanical loot map with excellent Water Pump potential.

1. Shipping Warehouse

A prime mechanical spawn location.

Search:

·Pallet racks

·Metal crates

·Tool benches

Large open interiors allow for systematic sweeps.

2. Fuel Control

Small mechanical rooms are often overlooked. Check shelves and cabinets carefully.

3. Rocket Assembly

Expansive industrial interiors mean high loot density.

Focus on:

·Worktables

·Equipment boxes

·Side storage rooms

4. Container Storage

Stacked metal containers often conceal loot in tight compartments. Many players pass through too quickly.

5. Vehicle Maintenance

Garages and repair bays are excellent for mechanical spawns.

Look inside:

·Red lockers

·Toolboxes

·Under shelving units

How to Spot a Water Pump

The biggest challenge isn’t access – it’s visibility.

Water Pumps are:

·Small

·Metallic

·Easy to overlook

·Often partially hidden

They may spawn:

·Loose on tables

·On shelves

·On top of boxes

·Inside lockers

·Inside metal crates

Slow your looting pace. In dim lighting, adjust your camera angle and scan surfaces from multiple viewpoints.

Speed looting often means missing the item entirely.

Farming Strategy Tips

If Water Pumps are your priority, optimize your runs.

1. Avoid High-Traffic PvP Routes

Unless you’re confident in combat, avoid predictable hotspots.

2. Stick to Industrial Interiors

Residential and commercial buildings rarely spawn mechanical components.

3. Bring

a medium backpack with a capacity

Water Pumps don’t take much space, but you’ll want room for other ARC Raiders Items you collect along the way.

4. Extract Early If You Find One

Because the item is rare, don’t gamble unnecessarily. Securing one is better than risking it for marginal extra loot.

Should You Buy or Farm?

Water Pumps occasionally appear in player trading channels or secondary markets. However, farming is usually more cost-effective.

Selling other ARC Raiders Items to fund a purchase is possible, but Coins are better saved for long-term progression systems – especially if you’re preparing to buy ARC Raiders BluePrints.

Blueprints unlock permanent crafting access and scale your power far beyond what a single project material can provide.

In most cases, farm the Water Pump – invest your currency elsewhere.

Is the Weather Monitor Project Worth It?

Absolutely.

Completing the Weather Monitor project:

·Advances base development

·Provides passive bonuses

·Improves long-term efficiency

·Contributes to structured progression

While the Water Pump may feel like a frustrating bottleneck, finishing the stage unlocks meaningful advantages.

Bonus Tip: Farm Smart, Not Narrow

The most efficient Raiders multitask.

Instead of running dedicated “Water Pump only” raids:

·Farm ARC machines

·Collect high-value ARC Raiders Items

·Complete side objectives

·Gather crafting materials

Even if you don’t find a Water Pump, your run still contributes to stash value and long-term growth.

This layered efficiency also accelerates your path toward advanced crafting systems and prepares you financially to buy ARC Raiders Blueprints when the time comes.

Final Thoughts

Water Pumps may have once been overlooked scrap, but in today’s ARC Raiders economy, they’re a strategic bottleneck item tied directly to meaningful progression.

To recap:

·Farm industrial zones in Dam Battlegrounds and Spaceport

·Search lockers, crates, tables, and mechanical interiors

·Slow down and visually scan

·Extract safely once secured

While hunting Water Pumps, continue collecting rare ARC Raiders Items and strengthening your stash. Smart farming now reduces future grind and positions you to expand into higher-tier crafting systems.

In ARC Raiders, today’s junk is tomorrow’s progression gate.

Adapt quickly. Loot carefully. And never underestimate a small mechanical component again.

Open post

Meta Pistol Builds You Should Use in Call of Duty:Black Ops 7

Call of Duty:Black Ops 7 is already pushing players to optimize every part of their loadout, and pistols are no longer an afterthought. With faster gunfights, tighter maps, and punishing reload windows, a strong sidearm can easily decide the outcome of an engagement. Whether you’re quick-scoping with a sniper rifle, sprinting through tight corridors, or simply caught mid-reload, BO7’s pistols deliver far more lethality than expected.

Built correctly, these secondary weapons can rival primaries in close-range fights and provide clutch reliability when it matters most.

Why Pistols Are Crucial in Black Ops 7

In high-pressure scenarios, speed beats everything. Weapon swapping is significantly faster than reloading, and a well-optimized pistol can eliminate enemies in a fraction of a second. Black Ops 7 offers three standout pistols, each tailored to a different playstyle:

Jager 45 – High-impact shots designed for precision and quick swaps

Velox 5.7 – Burst-fire control with devastating close-range output

CODA 9 – Fully automatic firepower that behaves like a compact SMG

Testing and practicing these builds—especially in CoD Black Ops 7 Bot Lobbies—helps refine reaction time, aim consistency, and weapon swap efficiency before jumping into competitive matches.

1.Best Jager 45 Loadout – Precision Damage Specialist

    The Jager 45 begins as a basic semi-automatic sidearm, but with the right attachments, it transforms into one of the most punishing pistols in the game. This build focuses on maximizing damage and accuracy, turning the weapon into a true hand cannon.

    Build Insight

    The long-barrel damage conversion is the centerpiece of this setup. It dramatically increases bullet damage and extends the pistol one-shot headshot potential, making the Jager feel closer to a heavy-caliber handgun than a standard sidearm.

    Strengths of This Build:

    Extremely high damage per shot

    Rewards players with controlled, accurate aim

    Ideal secondary for snipers and assault rifle users

    Capable of securing kills at unexpected distances

    Recommended Attachments:

    Muzzle:Ported-45 Brake

    Barrel:9.6″ MFS Vital Ace

    Rear Grip:Intercept Grip

    Laser:AirGlide Target Laser

    Fire Mod:Pistol Recoil Sprint

    This setup prioritizes stability, precision, and bullet velocity. Avoid rapid-fire modifiers, as excessive recoil quickly undermines the Jager strength.

    2.Best Velox 5.7 Loadout – Close-Range Burst Control

      The Velox 5.7 excels in tight spaces where accuracy and timing matter most. Its burst-fire design allows it to eliminate targets in just two bursts within close range, giving it one of the fastest kill times among pistols.

      Build Insight

      One of the Velox biggest advantages is its swap speed. Certain barrel options dramatically reduce transition time, allowing players to instantly pull the pistol in panic situations—perfect for aggressive movement-focused playstyles.

      Strengths of This Build:

      Devastating burst damage at close range

      Extremely fast weapon swap speed

      Ideal for players who favor precision over spraying

      Strong mobility and ADS performance

      Recommended Attachments:

      Muzzle:Greaves Covert-S

      Barrel:4″ MFS Celeste

      Magazine:Corvus Extended Mag

      Rear Grip:Quick Spine Grip

      Laser:AirGlide Target Laser

      This configuration enhances movement speed, ADS responsiveness, and handling while slightly improving damage reach. The extended magazine ensures you can finish fights without risky reloads.

      3.Best CODA 9 Loadout – The Pocket SMG

        For players who prefer nonstop aggression, the CODA 9 is the most dangerous pistol in Black Ops 7. Its fully automatic firing and rapid time-to-kill allow it to dominate close-quarters combat, especially with extended magazine support.

        Why This Build Shines:

        Fastest close-range TTK among pistols

        Large magazine capacity for multi-enemy encounters

        Functions like a lightweight SMG

        Perfect backup for sniper and marksman rifle users

        Recommended Attachments:

        Muzzle:Bowen 9mm Suppressor

        Barrel:6.3″ Greaves Halberd

        Magazine:MFS Deltacell Bulk Mag

        Rear Grip:Express Grip

        Fire Mod:Recoil Sync Unit

        This setup stabilizes recoil, improves handling, and extends effective range just enough to remain lethal beyond point-blank fights. The suppressor also makes the CODA 9 an excellent option for stealth-oriented loadouts.

        Pistols in Call of Duty:Black Ops 7 are more impactful than ever, offering reliable solutions for Multiplayer, Zombies, and late-game situations. Whether you favor heavy-hitting precision, burst accuracy, or full-auto aggression, these builds ensure your secondary weapon is never a liability.

        If you’re looking to refine your aim, improve swap timing, or experiment with these pistol loadouts without pressure, many players choose to buy CoD Black Ops 7 Bot Lobbies to practice in a controlled, stress-free environment before entering Ranked play.Practice smarter. Progress faster. Play better with MMOexp buy Black Ops 7 Bot Lobbies.

        Open post

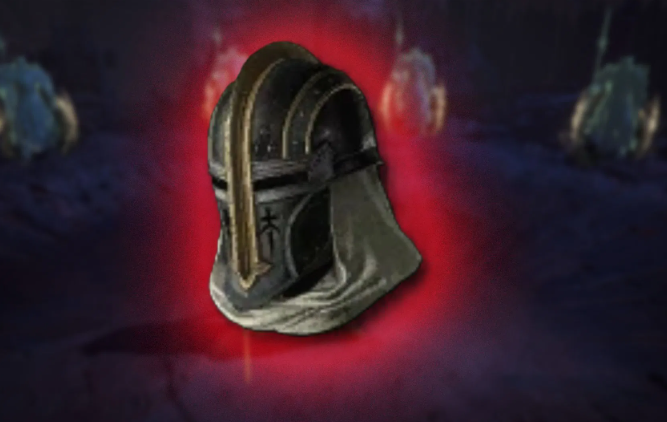
        Diablo 4 Season 11: Judicant’s Glaivehelm Guide

        For Paladins focused on Judicator skill builds in Diablo 4, the Judicant’s Glaivehelm is an essential Unique helmet. While it doesn’t directly boost any single ability, it interacts with all Judicator skills, providing a versatile passive damage boost that significantly increases overall Judgement output. This helmet is perfect for players aiming to dominate Nightmare Dungeons, Torment-level bosses, or high-density Helltide events.

        In this guide, we’ll break down the helmet’s unique effects, stats, best farming locations, and strategies for optimizing Judicator builds around this powerful item.

        What Is Judicant’s Glaivehelm?

        Judicant’s Glaivehelm is a Unique helmet designed exclusively for Paladin Judicator builds. Its core effect allows Paladins to generate additional Judgement damage through the Spear of the Heavens, which triggers on Lucky Hit when using a Judicator ability. Each spear automatically applies a Judgement mark, which can then be detonated by other skills if the appropriate upgrades are equipped.

        This effect makes the helmet extremely versatile, as it enhances multiple Judicator abilities simultaneously without requiring extra input, making it ideal for high-paced combat and AoE-heavy encounters.

        Key Stats and Affixes

        Judicant’s Glaivehelm comes with powerful affixes that synergize well with Judicator skill builds:

        ·+Maximum Resource – Helps maintain high uptime on Judicator abilities.

        ·+Lucky Hit Chance – Increases the likelihood of triggering Spears of the Heavens.

        ·+Chance for Judgement to Deal Double Damage – Amplifies overall Judgement output.

        ·Ranks to Judicator Skills – Directly boosts the effectiveness of your skill tree.

        These affixes allow the helmet to scale exceptionally well in Torment difficulty and high-end dungeons. When combined with Lucky Hit-focused gear and Paragon upgrades, the helmet can produce enormous amounts of passive Judgement damage across multiple enemies.

        Where to Farm Judicant’s Glaivehelm

        Efficient farming of Judicant’s Glaivehelm requires targeting specific bosses and gathering unique treasure hoard materials. The most reliable sources include Lord Zir, Urivar, and occasionally Belial.

        1. Lord Zir – Fractured Peaks

        Lord Zir resides in The Darkened Way within the Fractured Peaks. Players can save time by teleporting to Ancient’s Seat and avoiding unnecessary traversal.

        ·Treasure Hoard Requirement: 12× Exquisite Blood

        ·Obtaining Materials: Exquisite Blood drops randomly during Helltides, with higher drop rates from bosses like the Blood Maiden or Duriel in Season 11.

        After gathering the materials, opening Zir’s chest gives a chance for Judicant’s Glaivehelm to drop.

        2. Urivar – Fields of Judgment

        Urivar is another reliable source for the helmet. Access to his treasure hoard requires 12 Judicator’s Masks, obtainable from:

        ·Kurast Undercity runs

        ·Random Helltide chest drops

        This makes Urivar a solid second option for farming the helmet while also collecting other Diablo 4 Items along the way.

        3. Belial – Kehjistan

        Belial is the rarest of the three farming options. He only appears as a random ambush after opening another boss’s hoard.

        ·Treasure Hoard Requirement: Betrayer’s Husks (drops exclusively from Belial ambush)

        ·Strategy: If Belial is difficult to locate, consider trading or buying D4 materials from the community to save time.

        Targeting these bosses efficiently maximizes your chances of obtaining Judicant’s Glaivehelm while also gathering other valuable loot.

        Unique Effect of Judicant’s Glaivehelm

        The defining effect of the helmet is its interaction with Judicator skills:

        ·Lucky Hit triggers a Spear of the Heavens when hitting enemies with any Judicator ability.

        ·The spear applies a Judgement mark, which can be detonated by other abilities if you have the appropriate upgrades.

        This makes Judicant’s Glaivehelm particularly effective for:

        ·Judgement-focused builds: Generates extra damage passively.

        ·Area-of-effect synergy: Spears can hit multiple enemies, spreading Judgement marks efficiently.

        ·Scaling damage: Lucky Hit stacking increases the number of Spears and overall damage output.

        To maximize effectiveness, Paladins should focus on increasing Lucky Hit Chance through gear, affixes, and Paragon Nodes.

        Optimizing Judicant’s Glaivehelm

        To get the most out of the helmet:

        1. Stack Lucky Hit Chance: This is essential for triggering Spears consistently.

        2. Upgrade Judicator Skills: Ensure your skills can detonate Judgement marks efficiently.

        3. Pair with Judgement-focused items: Combine with gear like Judicator Oath to further amplify damage.

        4. Farm efficiently: Focus on Helltides and lair bosses for materials, or trade/buy Diablo 4 materials if RNG is unfavorable.

        With proper optimization, Judicant’s Glaivehelm can transform a solid Judicator setup into a devastating endgame powerhouse capable of clearing Nightmare Dungeons and Torment bosses with ease.

        Conclusion

        Judicant’s Glaivehelm is a must-have for Paladins running Judicator skill builds. Its Lucky Hit effect-summoning Spears of the Heavens that apply Judgement marks-adds a significant layer of passive damage. While obtaining the helmet requires careful farming of bosses like Lord Zir, Urivar, and occasionally Belial, the payoff is immense.

        Efficient farming of Helltides, dungeons, or trading/buying Diablo 4 materials can speed up acquisition, allowing players to focus on maximizing Judicator build potential. Whether soloing Nightmare content, tackling Torment-level bosses, or running group setups, Judicant’s Glaivehelm offers scalability, flexibility, and high passive damage, making it an indispensable part of any endgame Paladin arsenal.

        Open post

        The Ultimate 5 HCSSF Builds for Path of Exile 3.27

        The Uber Boss Kill Event has officially gone live in Path of Exile:Keepers of the League, and it’s shaping up to be one of the toughest challenges GGG has ever released. Because the event takes place entirely in HCSSF, you’ll be playing with no trading, no grouping, and – most importantly – a single life. Only the most reliable, consistent, and self-sufficient builds have a real chance at clearing the Uber encounters.

        Below are the five strongest HCSSF builds you can use to tackle the event and push for top-tier boss kills.

        1.Earthshatter Berserker

          Earthshatter Berserker remains a powerhouse option thanks to its explosive burst potential and unmatched rhythm of Warcry-triggered spikes. With the core mechanics untouched in the Keepers update, the build still dominates high-pressure solo boss content.Don’t wait for victory-buy your POE currency and start ruling the kingdom!

          Why It Excels

          Massive burst damage through Warcry loops

          Superb mobility via Leap Slam

          Functions well on self-crafted rare items

          Straightforward playstyle with high impact

          Suggested Links

          Earthshatter:Fortify-Overexertion-Pulverise-Melee Physical Damage-Brutality

          Movement:Leap Slam-Rage-Faster Attacks-Momentum

          Leap into enemies to build Rage, then unleash crushing AoE slams. With auto-triggering Warcries, your damage and defensive layers stay active constantly.

          2.Reap / Exsanguinate Elementalist

            For players who enjoy spellcasting and DoT-based gameplay, this hybrid Reap–Exsanguinate Elementalist offers long-range pressure, strong boss damage, and impressive scaling with physical damage-over-time.

            Why It Excels

            Long-range DoT ideal for HCSSF safety

            Great against tanky bosses thanks to scaling via gem levels

            Golem buffs provide sustain and consistency

            Strong synergy with Keepers modifiers that support phys DoT

            Suggested Links

            Reap:Cruelty-Efficacy-Brutality-Swift Affliction-Corrupting Fever

            Exsanguinate:Unbound Ailments-Controlled Destruction-Chain

            Golems:Flame, Chaos, Stone, Lightning

            Auras:Malevolence, Pride, Vulnerability

            This build is fully viable in self-found, but in trade leagues you can further upgrade it using +physical spell level wands or amulets.

            3.Righteous Fire Chieftain

              If pure survivability is your number one priority, Righteous Fire Chieftain remains the safest and most durable pick. With unmatched regeneration and high defensive layering, it’s ideal for drawn-out Uber boss attempts.

              Why It Excels

              Extremely tanky with 80%+ fire resistance

              Heavy life regen and armor stacking

              Great for long boss fights where survivability is key

              Simple but highly reliable gameplay loop

              Suggested Links

              Righteous Fire:Elemental Focus-Efficacy-Swift Affliction-Burning Damage-Lifetap

              Fire Trap:Trap and Mine Damage-Swift Affliction-Burning Damage-Concentrated Effect

              Walk through enemies as RF melts them, and drop Fire Trap in boss encounters to amplify your burning damage. With enough regen and resistance, you can endure nearly anything.

              4.Kinetic Blast Hierophant

                For ranged enthusiasts, Kinetic Blast Hierophant delivers massive screen-wide clearing and surprisingly strong single-target when built for projectile scaling. Though unconventional for HCSSF, it’s remarkably safe due to its range and mobility.

                Why It Excels

                Long-distance combat keeps you out of danger

                Impressive scaling with spell and projectile modifiers

                Great crowd control for mapping

                Suggested Links

                Kinetic Blast of Clustering:Returning Projectiles-Physical to Lightning-Lightning Penetration

                Movement:Shield Charge-Faster Attacks-Rage-Momentum
                Utility:Wall of Force-Second Wind-Faster Casting

                Kinetic Blast clears screens in an instant. Add Spellslinger Tornado for even more DPS layering and smoother bossing.

                5.Ground Slam Slayer

                  For fans of classic melee, Ground Slam Slayer offers big, reliable hits, excellent life recovery, and strong boss-killing efficiency. Its blend of AoE and sustain makes it a strong contender in HCSSF.

                  Why It Excels

                  Wide-area slams that destroy packs and bosses alike

                  Slayer built-in Culling Strike for quick boss finishes

                  Exceptional life leech and sustain

                  Straightforward, beginner-friendly playstyle

                  Suggested Links

                  Ground Slam:Fist of War-Fortify-Cruelty-Melee Physical Damage-Brutality

                  Movement:Leap Slam-Faster Attacks-Maim-Momentum

                  Leap in, apply Maim, and unleash hammer-like shockwaves that chunk bosses down. Slayer defenses help shrug off deadly hits during intense encounters.Unleash the power of purchasing buy POE currency through MMOexp and unlock endless possibilities!

                  The HCSSF Uber Boss Kill Event in the Keepers League is a brutal test of endurance, skill, and build knowledge. Whether you opt for the destructive power of Earthshatter Berserker, the incredible durability of Righteous Fire Chieftain, or the safe range of Kinetic Blast Hierophant, each build above offers a viable avenue to conquer PoE hardest bosses with zero room for error.

                  Open post

                  Call of Duty: Black Ops 7 Zombies – Best Guns to Use for Maximum Damage

                  Call of Duty: Black Ops 7 Zombies may be one of Treyarch’s biggest undead offerings ever, delivering a massive amount of replay value across Ashes of the Damned, Vandorn Farm Survival, and Dead Ops Arcade 4. With tougher Special enemies, faster scaling health, and more aggressive boss encounters, your weapon choices matter more than ever. Whether you’re pushing for late-round high scores or hunting every Easter Egg, picking the right guns is the key to survival.

                  This guide breaks down the best weapons in Black Ops 7 Zombies for maximum damage, focusing solely on standard guns-not Wonder Weapons. Each pick was chosen for its DPS potential, ammo economy, Pack-a-Punch strength, mobility, and boss-killing capabilities.

                  1. Jager (Pistol)

                  ·Pack-a-Punch Variant: Geri

                  ·PaP Bonuses: Shotgun conversion, increased ammo capacity, more serious damage

                  The Jager may look like a basic starter pistol, but in Zombies, it becomes a monster. Once Pack-a-Punched, its Geri variant fires a devastating shotgun-style spread capable of erasing anything up close. This transformation gives it one of the highest burst-damage profiles of any pistol in Black Ops 7.

                  Fast ADS speed, great mobility, and near-instant handling make it perfect as a high-damage secondary weapon. When paired with the Skull Splitter Barrel, the Jager can melt even tankier enemies like the Zursa boss with accurate critical hits. For players who love high-mobility run-and-gun gameplay, this pistol is a must-try.

                  2. DS20 Mirage (Assault Rifle)

                  ·Pack-a-Punch Variant: Duality of Blam

                  ·PaP Bonuses: Increased ammo, more serious damage

                  The DS20 Mirage stands out as one of the best Assault Rifles in Black Ops 7 Zombies thanks to its outrageous neck multiplier, which no other AR can match. With excellent recoil control and smooth fire patterns, it’s perfect for stacking headshots and maintaining crit streaks.

                  Its true power appears with Double Tap equipped-where its DPS skyrockets when you consistently target the neck and head. Because it’s available as a wall buy at Zarya Cosmodrome, it’s extremely reliable for long games, letting you replenish ammo without relying on random drops. For players taking on the Ashes of the Damned boss fight without Wonder Weapons, the Mirage is a top-tier pick.

                  3. Peacekeeper MK1 (Assault Rifle)

                  ·Pack-a-Punch Variant: Utu’s Petition

                  ·PaP Bonuses: Higher ammo capacity, improved damage

                  The fan-favorite Peacekeeper MK1 makes a powerful comeback in BO7 Zombies. Its exceptionally fast fire rate, consistent recoil pattern, and top-tier critical hit potential make it one of the most reliable mid-tier rifles in the entire mode.

                  Because it is also a wall buy, it’s ideal for long survival runs. Its forgiving recoil makes it a top pick for players improving their aim in Call of Duty Black Ops 7 Bot Lobbies or for those looking to buy CoD Black Ops 7 Bot Lobbies services to practice routes more efficiently.

                  4. Akita (Shotgun)

                  ·Pack-a-Punch Variant: Hachiko

                  ·PaP Bonuses: Huge magazine boost, increased damage

                  If you’re craving Black Ops 7’s version of the iconic Maelstrom, the Akita is your shotgun. Already strong in its base form, once Pack-a-Punched into Hachiko, it becomes an unstoppable, full-auto horde shredder.

                  The massive magazine upgrade offsets its rapid fire rate, letting you clear entire waves without stopping to reload. The Akita is incredible for Special Rounds, Ravagers, and dealing with tight corridors-though its range remains limited. For players who prefer up-close carnage and want a weapon capable of deleting anything within arm’s reach, nothing beats the Akita.

                  5. MK.78 (LMG)

                  ·Pack-a-Punch Variant: Meteoric Kalamity

                  ·PaP Bonuses: Faster movement speed, more ammo, boosted damage

                  The MK.78 LMG transforms from a slow Multiplayer option into one of the single strongest weapons in Zombies once Pack-a-Punched. Its recoil is incredibly stable, its crit damage is massive, and its long-range stopping power rivals the best sniper rifles.

                  While the reload time is slow, perks like Speed Cola, Deadshot Daiquiri, and Double Tap completely fix its weaknesses. Against bosses-especially the Zursa MK.78 delivers some of the highest sustained DPS available from a standard gun. If you want a reliable boss-slayer for late rounds, this LMG is unmatched.

                  6. CODA 9 (Pistol)

                  ·Pack-a-Punch Variant: NO-KAP

                  ·PaP Bonuses: Higher ammo capacity, increased damage

                  The CODA 9 became a fan-favorite during the Black Ops 7 Beta thanks to its blistering fire rate, superior mobility, and lightning-fast ADS speed. Those traits make it one of the most flexible early-game weapons in Zombies.

                  Its high rate of fire gives it DPS comparable to some SMGs, and since it’s the first wall buy in Ashes of the Damned, you can grab enhanced rarity versions early without spending Salvage. For early-round speed and fast map progression, the CODA 9 is one of the best choices in the game.

                  7. Ryden 45k (SMG)

                  ·Pack-a-Punched Variant: Sybil’s Sentence

                  ·PaP Bonuses: More ammo, increased damage

                  The Ryden 45k is a meta favorite in both Multiplayer and Zombies. Its extremely fast fire rate and elite mobility allow you to navigate zombie trains effortlessly. While it burns through ammo quickly, multiple convenient wall buy spots make refills easy.

                  For players running aggressive training strategies or grinding XP-and especially those practicing in Black Ops 7 Bot Lobbies, the Ryden is one of the most forgiving and consistent SMGs available.

                  Final Thoughts

                  Black Ops 7 Zombies offers an impressive arsenal across pistols, rifles, SMGs, LMGs, and shotguns. When you’re chasing high rounds, speedrunning the main Easter Egg, or prepping for boss encounters, choosing the right weapons is essential for survival. The guns above offer the strongest balance of power, efficiency, mobility, and Pack-a-Punch potential, making them the best choices for maximum damage in Call of Duty: Black Ops 7 Zombies.

                  Posts navigation

                  1 2 3 4 5 6 19 20 21
                  Scroll to top