

Open post

The Best Warlock Leveling Build in Diablo 4

Diablo 4’s Warlock, introduced in the Lord of Hatred expansion, is a versatile class blending hellfire destruction, shadow magic, and demon summoning. While it offers multiple playstyles, leveling requires a build that prioritizes speed, AoE damage, and minimal gear dependency. This guide breaks down the optimal Warlock leveling build for Season 13, designed to carry you from Level 1 to 70 smoothly-no rare or legendary gear required to start.

This build focuses on the “Blazing Scream Hellfire” playstyle, leveraging long-range damage, crowd control, and resource efficiency. It excels at clearing large enemy packs (the key to fast leveling) while keeping you safe at a distance, making it perfect for both new and experienced players. So you need powerful Diablo 4 Items to help you.

Why This Build Is Perfect for Leveling

Leveling success in Diablo 4 boils down to three core factors: speed, survivability, and low gear requirements. This Warlock build checks all three boxes, with distinct advantages over other playstyles like Demon Summoner or Melee Dread Claws.

First, it relies on ranged AoE damage to clear mobs quickly-quantity over quality is the golden rule for leveling, and this build excels at chaining kills to maximize experience gains. Second, it includes built-in defensive tools to avoid unnecessary deaths, which slow down progress.

Most importantly, it requires no specific gear or Aspects to function. You can start using it at Level 1 and scale smoothly as you unlock new skills and upgrades, making it accessible for seasonal fresh starts or first-time Warlock players.

Core Skill Setup (Level 1-70 Progression)

The build’s skill lineup evolves as you level up, but the core focus remains consistent: long-range damage, resource generation, crowd control, and burst potential. Below is the step-by-step skill progression, with key upgrades highlighted.

Basic Skill: Doom (With Upgrades)

Doom is your foundation for resource generation and debuffing enemies. It’s a mid-range skill that attacks foes in front of you and applies “Curse” stacks-each stack increases the damage enemies take from your Abyss skills based on their missing health.

Unlock these upgrades in order as you level: Assimilation (hits on weakened enemies spread debuffs), Wrath (generates Wrath for each Cursed enemy), and Contagion (killing a Cursed enemy spreads Doom to another target). These upgrades turn Doom from a simple resource generator into a key part of your damage chain.

Core Skill: Blazing Scream (With Upgrades)

Blazing Scream is your primary damage dealer. It summons a demonic skull that flies forward, bouncing off walls to hit multiple enemies-ideal for clearing tight corridors or large packs. It costs Wrath, so pair it with Doom to keep your resource bar full.

Prioritize these upgrades: Cost Reduction (lowers Wrath cost by 25% for 2 seconds) and Skull Splitter (adds small tracking skulls to hit more targets). These upgrades boost your AoE coverage and allow you to cast Blazing Scream more frequently.

Defensive Skill: Dark Prison

Survivability is critical for leveling, and Dark Prison is your best defensive tool. This skill summons a totem that traps nearby enemies-while it can’t bind bosses, it’s perfect for locking down packs so you can attack safely from a distance.

Add the Weakened and Fortify upgrades: Weakened reduces enemy damage (20% for regular mobs, 10% for bosses), and Fortify grants you 1% of your max health for each hit on trapped enemies. This combination keeps you alive even when outnumbered.

Archfiend Skill: Infernal Breath

Unlocked at Level 8, Infernal Breath is your burst damage skill for elites and bosses. It summons a large demonic head that sprays fire, dealing massive damage to frontline enemies. While it takes practice to aim, its upgrades make it indispensable.

Upgrade with Ramping Damage (each hit increases damage by 1% up to 25%) and Abyssal Torrent (secondary cast fires three high-damage orbs and executes Cursed enemies). This turns Infernal Breath into a boss-slaying machine.

Sigil Skill: Sigil of Chaos

Unlocked at Level 13, Sigil of Chaos is your key buff skill. It creates a circular area that grants you “Volatility”-a random boost to hellfire skills (up to 50% damage) when you stand inside. Enemies killed in the area also have a chance to explode, damaging nearby foes.

Use the Volatility Duration (keeps the buff for 10 seconds after leaving the area) and Diabolic Rebuke (damages enemies that attack you in the area) upgrades. Always cast Sigil of Chaos first in fights to maximize your damage.

Soul Shard: Ritualist Shard

Unlocked at Level 15 via the Warlock class quest, Soul Shards define your build’s identity. For this leveling build, the Ritualist Shard is optimal-it passively boosts your Occult and Hellfire skills based on your Overpower stacks.

Add the Twisted Fragment upgrade to unlock Summon Valloch, a demon companion that fights alongside you. Reactivating Summon Valloch grants 10 Overpower stacks and boosts resource regeneration-use it on cooldown to keep your damage high.

Leveling Playstyle & Rotation

The build’s rotation is simple and intuitive, designed to keep you moving and clearing mobs quickly. Follow this flow to maximize efficiency:

Start with Summon Valloch (from the Ritualist Shard) to gain Overpower stacks and a companion.

Cast Sigil of Chaos to activate the Volatility buff-always place it where you’ll be fighting to keep the buff active.

Use Dark Prison to trap enemy packs, reducing their damage and keeping them grouped.

Spam Blazing Scream to clear mobs-use its Skull Splitter upgrade to hit as many targets as possible.

Use Doom to generate Wrath when your resource runs low, and to apply Curse stacks for Infernal Breath’s execute.

Save Infernal Breath for elites, bosses, or large packs-use Abyssal Torrent for maximum burst damage.

For early levels (1-7), before unlocking all skills, focus on Doom and Blazing Scream. Use Doom to generate Wrath, then cast Blazing Scream to clear packs. Avoid getting too close to enemies, as Doom’s mid-range reach requires some positioning.

Gear & Stat Priorities

While this build doesn’t need specific gear, prioritizing certain stats and Aspects will speed up your leveling. Here’s what to look for as you loot:

Weapons: Prioritize base damage first-faster attack speed also helps with Wrath generation. Look for weapons with +Hellfire Damage or +Curse Damage to boost your core skills.

Armor: Focus on Armor and Maximum Life to improve survivability. Fortify chance is also useful, as it stacks with Dark Prison’s Fortify upgrade.

Aspects: While not required, these Aspects will enhance your build: Aspect of Ignition (boosts Hellfire damage), Aspect of Slaughter (increases movement speed), and Aspect of Disobedience (increases Armor with each hit).

Gems: Use Rubies in weapons (increase damage) and Topaz in armor (increase Armor). For jewelry, use Amethysts to boost Life Steal-small but impactful for survivability.

Pro Tips for Faster Leveling

Choose World Tier Hard to start-this balances experience gain and enemy difficulty. Avoid Expert unless you have good gear, as the extra challenge slows down clearing speed.

Complete Strongholds on your first playthrough-they offer massive experience boosts scaled to your level, making them ideal for leveling after Level 50.

Participate in Hell Tides if unlocked-they provide tons of experience, crafting materials, and early legendary gear, letting you level from 1 to 60 in hours instead of days.

Skip unnecessary exploration until you get a mount-Sanctuary is vast, and the Warlock is slow without one. Seasonal characters can unlock mounts at Level 1 if you skip the campaign.

Refund skill points as needed-some upgrades unlock at higher levels (e.g., Abyssal Torrent at Level 36), so temporary points in other nodes will keep your damage high while leveling.

Final Thoughts

This Blazing Scream Hellfire build is the best Warlock leveling option for Diablo 4 Season 13. It’s fast, easy to learn, and requires no rare gear to start-perfect for new players or those looking to rush to endgame.

By following the skill progression, rotation, and tips in this guide, you’ll sail through levels 1 to 70, unlocking the Warlock’s full potential while enjoying a fluid, engaging playstyle. Once you hit max level, you can easily transition this build into an endgame setup by swapping Aspects and optimizing your gear. At the same time, utilizing cheap Diablo 4 materials allows you to become stronger much faster.

Whether you’re summoning demons, wielding hellfire, or weaving shadow magic, this build lets you experience the Warlock’s strengths while leveling efficiently-so grab your staff, embrace the darkness, and start clearing Sanctuary.

Open post

Diablo 4 Season 11: Judicant’s Glaivehelm Guide

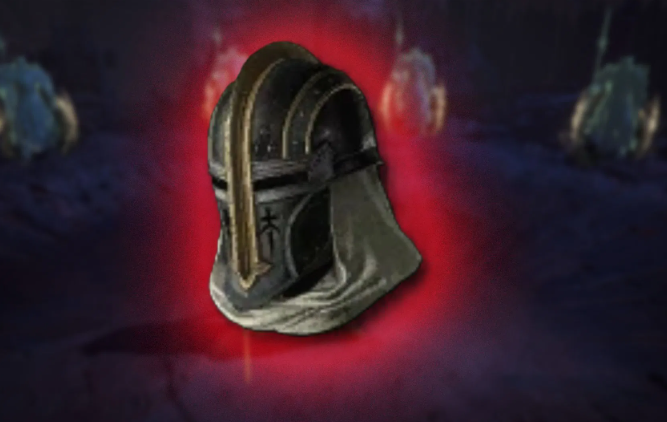
For Paladins focused on Judicator skill builds in Diablo 4, the Judicant’s Glaivehelm is an essential Unique helmet. While it doesn’t directly boost any single ability, it interacts with all Judicator skills, providing a versatile passive damage boost that significantly increases overall Judgement output. This helmet is perfect for players aiming to dominate Nightmare Dungeons, Torment-level bosses, or high-density Helltide events.

In this guide, we’ll break down the helmet’s unique effects, stats, best farming locations, and strategies for optimizing Judicator builds around this powerful item.

What Is Judicant’s Glaivehelm?

Judicant’s Glaivehelm is a Unique helmet designed exclusively for Paladin Judicator builds. Its core effect allows Paladins to generate additional Judgement damage through the Spear of the Heavens, which triggers on Lucky Hit when using a Judicator ability. Each spear automatically applies a Judgement mark, which can then be detonated by other skills if the appropriate upgrades are equipped.

This effect makes the helmet extremely versatile, as it enhances multiple Judicator abilities simultaneously without requiring extra input, making it ideal for high-paced combat and AoE-heavy encounters.

Key Stats and Affixes

Judicant’s Glaivehelm comes with powerful affixes that synergize well with Judicator skill builds:

·+Maximum Resource – Helps maintain high uptime on Judicator abilities.

·+Lucky Hit Chance – Increases the likelihood of triggering Spears of the Heavens.

·+Chance for Judgement to Deal Double Damage – Amplifies overall Judgement output.

·Ranks to Judicator Skills – Directly boosts the effectiveness of your skill tree.

These affixes allow the helmet to scale exceptionally well in Torment difficulty and high-end dungeons. When combined with Lucky Hit-focused gear and Paragon upgrades, the helmet can produce enormous amounts of passive Judgement damage across multiple enemies.

Where to Farm Judicant’s Glaivehelm

Efficient farming of Judicant’s Glaivehelm requires targeting specific bosses and gathering unique treasure hoard materials. The most reliable sources include Lord Zir, Urivar, and occasionally Belial.

1. Lord Zir – Fractured Peaks

Lord Zir resides in The Darkened Way within the Fractured Peaks. Players can save time by teleporting to Ancient’s Seat and avoiding unnecessary traversal.

·Treasure Hoard Requirement: 12× Exquisite Blood

·Obtaining Materials: Exquisite Blood drops randomly during Helltides, with higher drop rates from bosses like the Blood Maiden or Duriel in Season 11.

After gathering the materials, opening Zir’s chest gives a chance for Judicant’s Glaivehelm to drop.

2. Urivar – Fields of Judgment

Urivar is another reliable source for the helmet. Access to his treasure hoard requires 12 Judicator’s Masks, obtainable from:

·Kurast Undercity runs

·Random Helltide chest drops

This makes Urivar a solid second option for farming the helmet while also collecting other Diablo 4 Items along the way.

3. Belial – Kehjistan

Belial is the rarest of the three farming options. He only appears as a random ambush after opening another boss’s hoard.

·Treasure Hoard Requirement: Betrayer’s Husks (drops exclusively from Belial ambush)

·Strategy: If Belial is difficult to locate, consider trading or buying D4 materials from the community to save time.

Targeting these bosses efficiently maximizes your chances of obtaining Judicant’s Glaivehelm while also gathering other valuable loot.

Unique Effect of Judicant’s Glaivehelm

The defining effect of the helmet is its interaction with Judicator skills:

·Lucky Hit triggers a Spear of the Heavens when hitting enemies with any Judicator ability.

·The spear applies a Judgement mark, which can be detonated by other abilities if you have the appropriate upgrades.

This makes Judicant’s Glaivehelm particularly effective for:

·Judgement-focused builds: Generates extra damage passively.

·Area-of-effect synergy: Spears can hit multiple enemies, spreading Judgement marks efficiently.

·Scaling damage: Lucky Hit stacking increases the number of Spears and overall damage output.

To maximize effectiveness, Paladins should focus on increasing Lucky Hit Chance through gear, affixes, and Paragon Nodes.

Optimizing Judicant’s Glaivehelm

To get the most out of the helmet:

1. Stack Lucky Hit Chance: This is essential for triggering Spears consistently.

2. Upgrade Judicator Skills: Ensure your skills can detonate Judgement marks efficiently.

3. Pair with Judgement-focused items: Combine with gear like Judicator Oath to further amplify damage.

4. Farm efficiently: Focus on Helltides and lair bosses for materials, or trade/buy Diablo 4 materials if RNG is unfavorable.

With proper optimization, Judicant’s Glaivehelm can transform a solid Judicator setup into a devastating endgame powerhouse capable of clearing Nightmare Dungeons and Torment bosses with ease.

Conclusion

Judicant’s Glaivehelm is a must-have for Paladins running Judicator skill builds. Its Lucky Hit effect-summoning Spears of the Heavens that apply Judgement marks-adds a significant layer of passive damage. While obtaining the helmet requires careful farming of bosses like Lord Zir, Urivar, and occasionally Belial, the payoff is immense.

Efficient farming of Helltides, dungeons, or trading/buying Diablo 4 materials can speed up acquisition, allowing players to focus on maximizing Judicator build potential. Whether soloing Nightmare content, tackling Torment-level bosses, or running group setups, Judicant’s Glaivehelm offers scalability, flexibility, and high passive damage, making it an indispensable part of any endgame Paladin arsenal.

Open post

Diablo IV Season 10: Chaos Armor and the Future of Endgame Items

Seasonal updates have always been the lifeblood of Diablo 4, offering new mechanics, loot systems, and progression opportunities that keep Sanctuary vibrant and unpredictable. With the arrival of Season 10, Blizzard is introducing two major bonuses, but none has captured the community’s attention quite like Chaos Armor. This mechanic represents one of the most significant changes to the loot ecosystem since the game’s launch, promising to redefine what players expect from endgame rewards and the way they approach Diablo 4 Items.

Unlike the similarly named set from Diablo 2, Chaos Armor in Diablo 4 is a brand-new item tier built on Unique Items, providing greater flexibility, consistency, and power. In this article, we’ll explore how Chaos Armor works, why it’s so impactful, which Unique Items have Chaos variants, and the implications of Blizzard making it a seasonal feature.

What Is Chaos Armor?

At its core, Chaos Armor is a new gear type drawn from the pool of Diablo IV Items. Unlike standard Uniques that rely heavily on RNG for affixes and power levels, Chaos Armor guarantees two things:

1. Maximum Power Rolls – Every Chaos Armor item drops at its highest possible stats, eliminating the grind for perfect rolls.

2. Guaranteed Greater Affix – Each item comes with at least one Greater Affix, significantly stronger than standard bonuses.

These guarantees make Chaos Armor more than just rare loot-they are endgame-ready items capable of defining builds without weeks of rerolling or tempering.

However, Chaos Armor comes with specific limitations: it can only appear in five equipment slots: helms, gloves, boots, pants, and chestplates. Additionally, players cannot equip a Chaos variant alongside its normal Unique counterpart, preserving balance while enabling innovative item combinations.

Why Chaos Armor Matters

To understand Chaos Armor’s impact, consider the current Diablo 4 loot hierarchy:

·Legendary Items: Common with extractable effects but capped in potential.

·Unique Items: Stronger, build-defining items, harder to obtain, often untradeable once masterworked.

Chaos Armor acts as a “Unique-plus” tier, offering stronger, more reliable versions of existing Uniques. For high-end builds, where every stat point matters, a perfectly rolled Rage of Harrogath or Starfall Coronet could be the difference between comfortably clearing Nightmare Dungeons or struggling at the highest tiers.

This level of guaranteed quality also streamlines progression and encourages experimentation with different builds, as players no longer have to chase RNG perfection for essential Diablo 4 Items.

Unique Diablo 4 Items With Chaos Variants

Not all Uniques have Chaos Armor versions in Season 10, but the list is impressive and spans every class, plus several general Uniques:

·General Uniques: Banished Lord’s Talisman, Crown of Lucion, Endurant Faith, Fists of Fate, Flickerstep, Godslayer Crown, Locran’s Talisman, Mother’s Embrace, Paingorger’s Gauntlets, X’fal’s Corroded Signet

·Barbarian: Battle Trance, Hooves of the Mountain God, Rage of Harrogath, Mantle of Mountain’s Fury, Overkill, Tuskhelm of Joritz the Mighty, Sabre of Tsasgal (New Unique)

·Druid: Airidah’s Inexorable Will, Greatstaff of the Crone, Tempest Roar, Kilt of Blackwing (New Unique), Malefic Crescent

·Necromancer: Lidless Wall, Orphan Maker, Black River, Ring of Mendeln, Deathspeaker’s Pendant, Gospel of the Devotee (New Unique)

·Rogue: Beastfall Boots, Shroud of Khanduras, Orphan Maker (New Unique), Skyhunter, Saboteur’s Signet

·Sorcerer: Ophidian Iris, Fractured Winterglass, Starfall Coronet, Raiment of the Infinite, Galvanic Azurite (New Unique)

·Spiritborn: Balazan’s Maxtlatl, Peacemonger’s Signet, Rod of Kepleke, Hesha e Kesungi (New Unique), Loyalty’s Mantle

These Chaos variants provide players with enhanced stats and bonuses, giving them a powerful edge while experimenting with builds.

Seasonal Limitation: Pros and Cons

Blizzard has made it clear that Chaos Armor is exclusive to Season 10. Once the season ends, the mechanic will be vaulted, much like previous experimental systems.

Pros:

·Keeps content fresh with seasonal rotation.

·Encourages players to engage with the game actively.

·Provides data for developers to refine mechanics.

Cons:

·FOMO (Fear of Missing Out) for players who cannot complete their builds.

·Potential meta disruption for players relying on Chaos variants.

·Repeated vaulting can create instability in long-term gameplay.

Preparing for Chaos Armor

Players looking to take full advantage of Chaos Armor should focus on acquiring the right Diablo 4 Items and farming D4 materials early. Prioritize builds that can maximize the benefits of Chaos variants and aim to equip multiple items that synergize well together.

Final Thoughts

Chaos Armor represents one of Diablo 4 Season 10’s most significant innovations, transforming Uniques into highly reliable, endgame-ready Diablo IV Items. While its temporary nature introduces urgency and FOMO, the system provides a glimpse into the potential future of Diablo 4’s loot design.

Players should buy D4 materials, prepare their characters, and maximize their time in Season 10 to acquire as much Chaos Armor as possible. Once vaulted, this season’s loot system may not return, making now the perfect opportunity to experience the full power of Chaos Armor firsthand.

With guaranteed maximum rolls, powerful Greater Affixes, and widespread class applicability, Chaos Armor is poised to reshape the endgame meta, ensuring that Season 10 will be remembered as a landmark in Diablo 4’s evolving story.

Open post

Diablo 4 Tempering and Masterworking Guide

In Diablo 4, the crafting system offers players various ways to enhance their gear, making their characters more powerful and ready for the harsh challenges the game throws at them. Two of the most significant mechanics in this system are Tempering and Masterworking. These mechanics allow players to upgrade their equipment, increasing both the potential and versatility of their gear. Understanding how to use these systems effectively can be the difference between struggling through the toughest bosses and breezing through them with your high-powered gear.

In this guide, we will explore both Tempering and Masterworking, their mechanics, how to obtain materials, and how to make the best use of these systems to maximize your character’s strength.

What is Tempering in Diablo 4?

Tempering is one of the ways that players can upgrade their equipment in Diablo 4. It allows players to improve existing Diablo 4 Items by enhancing their properties, granting higher base stats, and potentially adding new modifiers. This process is typically used on rare or legendary items to boost their power or adjust their stats to better suit the player’s build.

How Tempering Works:

Base Items: You start with a piece of rare or legendary gear, such as a helmet, weapon, or armor.

Material Requirements: To temper an item, you will need specific crafting materials. These materials can be obtained through various in-game activities such as salvaging unwanted gear, completing certain quests, or defeating bosses.

Tempering Station: To actually temper an item, you must visit a Crafting Station or a Blacksmith in any major town or hub.

Tempering Process: The base item you select will undergo the tempering process, which enhances certain attributes (e.g., increased damage, enhanced defense, or better resistances). This process can be repeated up to a certain cap, making your item progressively more powerful.

Tempering Materials:

The specific materials required for tempering vary depending on the tier of the item being enhanced. Some common materials include:

Shards of the Elements: These are used for improving the elemental damage on gear.

Crafting Runes: Used to apply specific affixes or modifiers to the item.

Rare Materials: These are typically acquired from salvaging other rare or legendary gear.

Players can also gain access to special modifiers as they upgrade items through tempering. These modifiers can either amplify your main stats (such as Strength, Dexterity, Intelligence) or grant special effects like faster health regeneration, critical hit bonuses, or enhanced resistances.

Max Level for Tempering:

Each item has a cap on how many times it can be tempered. This cap is usually set by the rarity of the item:

Common Items: Cannot be tempered.

Rare Items: Can be tempered up to 3 times.

Legendary Items: Can be tempered up to 5 times.

Unique Items: These usually cannot be tempered, as they are already maxed out in terms of power and modifiers.

Tempering Best Practices:

Focus on improving key stats that complement your class build.

Prioritize Legendary items over Rare ones for higher maximum tempering upgrades.

Keep an eye on the crafting material economy in the game; some materials may be more valuable or in higher demand than others.

Don’t temper everything at once – carefully consider each piece of gear that you want to upgrade based on your current build and needs.

What is Masterworking in Diablo 4?

Masterworking is a more advanced system within the crafting mechanics of Diablo 4. While tempering enhances items by improving their stats, masterworking allows you to create new affixes and special modifiers that are not normally available through traditional item crafting. It’s essentially about taking your equipment to the next level, creating truly personalized, high-quality gear that can be fine-tuned to meet your specific needs.

How Masterworking Works:

Base Item: Masterworking starts with a rare or legendary item (like tempering), but it allows for deeper customization.

Masterwork Crafting Station: Players must visit the Masterwork Crafting Station (distinct from the normal crafting station) in order to apply the masterwork process. Here, you can combine your items with certain materials to introduce special bonuses or affixes that can radically change how your gear functions.

Masterwork Materials: The materials for masterworking come from more challenging sources and require a deeper investment of time and resources. Some examples include:

Elder Shards: Rare materials dropped by elite enemies or found in endgame dungeons.

Ancient Dust: A mysterious substance that can be obtained by breaking down Ancient gear found in high-level content.

Masterwork Runes: These runes allow you to attach specific modifiers that may not be available via other methods.

Once your item is masterworked, it will have new, unique properties that could give you an advantage in combat. For example:

Increased Attack Speed: A masterworked sword might gain faster attack speed, synergizing with other abilities or damage modifiers.

Elemental Resistances: Masterworked armor might give resistance to specific elements like fire, ice, or poison, which can be critical in certain encounters.

Critical Hit Damage: Some masterwork items may give boosts to critical hit damage or even grant the ability to deal damage over time when a critical hit is scored.

Masterwork vs. Tempering:

While Tempering focuses on enhancing existing stats, Masterworking allows for more customization, letting players add or alter specialized properties that best complement their playstyle. Masterworking also has the advantage of creating gear that is highly optimized for endgame content.

How to Masterwork an Item:

Choose the base item you wish to masterwork (typically a legendary item).

Gather the necessary Masterwork materials such as Elder Shards and Ancient Dust.

Visit the Masterwork Crafting Station and select the item you want to upgrade.

Apply the Masterwork Rune and any other cheap Diablo 4 materials.

The item will now have unique properties that cannot be obtained through normal tempering.

Masterwork Best Practices:

Endgame Content: Masterworking is best used for your endgame gear since it allows you to fine-tune items for maximum efficiency.

Synergy with Build: Consider the overall synergy of your build when choosing which properties to add. For example, a Barbarian might want damage bonuses to specific skills, while a Sorceress might need resistances and elemental damage increases.

Resource Management: Masterworking materials are rarer and harder to acquire than tempering materials, so use them wisely.

Where to Farm Crafting Materials for Tempering and Masterworking

Farming for Tempering Materials:

World Bosses: These massive bosses often drop large quantities of crafting materials.

Elite Packs: Certain elite packs in dungeons or on the world map have a higher chance to drop valuable tempering materials.

Salvaging: Salvage unwanted gear, especially rare and legendary items, to get back the crafting materials needed for tempering.

Treasure Goblins: Catching a Treasure Goblin can lead to a ton of crafting materials.

Farming for Masterworking Materials:

Endgame Dungeons: These challenging dungeons often drop Ancient Dust and Elder Shards, which are essential for masterworking.

High-Level Elite Monsters: Specific monsters found in endgame zones can drop rare materials.

Boss Fights: Bosses in higher difficulty modes provide the best chance of obtaining materials for masterworking.

Conclusion

Both Tempering and Masterworking are critical crafting mechanics that can drastically improve your gear in Diablo 4. Tempering enhances existing stats, while Masterworking allows you to customize your gear to meet your exact needs. Both systems require an investment of time, resources, and careful planning, but the payoff in terms of power and versatility is substantial. By combining these systems with smart material farming, you’ll be able to craft the perfect set of gear to dominate the Sanctuary and conquer even the toughest challenges the game has to offer.

Happy crafting, and may your gear always be legendary!

Scroll to top